How to Use E-Commerce Action
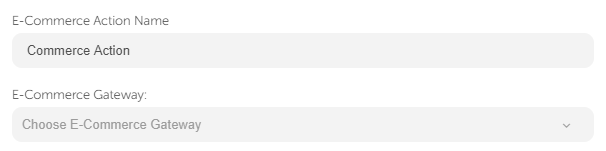
After this integration, the first step is to choose an e-commerce gateway for the action in the module. You need to select a gateway each time you use this action, even when you are in the same assistant.
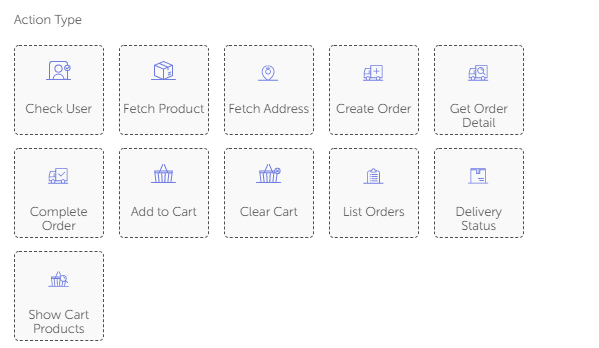
Action Types
Let's see what actions can be used under this module.
Check User
During a conversation, it's important if the customer is already registered in Shopify or T-Soft. We are taking the customer's telephone number to that.
For T-Soft, the first thing to do is asking the user's e-mail address with this given parameter name. Here, with the Check User action, we are checking if the telephone number matches the e-mail address, if it doesn't match we simply ask the user to update her telephone number.
For Shopify, If the customer is not registered since you've already taken their number, you should register this user to continue the flow. To do that, ask for their name and surname in input actions with the following parameter names (you should stick with these parameter names) to sign up for them.
ECOMMERCE_NAME will represent the customer's name.
And ECOMMERCE_SURNAME will represent the customer's surname.
Fetch Product
This action will help you to select the products that you wish to show your customer. Here, you need to enter the product ID of the product
.
After, you can display the product details to your customer with a card message just like in this example.
Here, please note that you shall use the names just like we used in these examples.
#ECOMMERCE_PIMAGE will get the product's image URL and make it visible on the card. #ECOMMERCE_PNAME displays the product's name and #ECOMMERCE_PDESC represents the customer's name.
Fetch Address
This action will help you to see if the customer has an address registered to Shopify or T-Soft.
If they don't have an address, you can create an address.
In Shopify you can create an address by collecting some information with input modules using the following parameters.
CUSTOMER_ADDRESS_OWNER_NAME will collect the customer's name who will pick the delivery.
CUSTOMER_ADDRESS_OWNER_SURNAME takes the customer's surname.
CUSTOMER_ADDRESS_FULL_ADDRESS is requesting the full address that the delivery will be sent to.
CUSTOMER_ADDRESS_CITY takes the city.
CUSTOMER_ADDRESS_DISTRICT is adding the district information to the address.
CUSTOMER_ADDRESS_POST_CODE will collect the postcode of the city/district that the delivery will be sent to.
For T-Soft, required fields to create an address are the ones in the following:
CUSTOMER_ADDRESS_FULL_NAME will collect the customer's name and surname who will pick the delivery.
CUSTOMER_ADDRESS_CITY takes the city.
CUSTOMER_ADDRESS_DISTRICT is adding the district information to the address.
CUSTOMER_ADDRESS_TOWN is to get the town information for the delivery address.
CUSTOMER_ADDRESS_POST_CODE will collect the postcode of the city/district that the delivery will be sent to.
CUSTOMER_ADDRESS_FULL_ADDRESS is requesting the full address that the delivery will be sent to.
Add to Cart
This action will make the customer add the product with the given ID to the cart. To create an order, the cart shouldn't be empty.
Clear Cart
Sometimes, customers can change their minds and decide to clear their cart, maybe cancel the session or just add new products. This action will help customers to clear all the products they've added to their carts.
Create Order
After you checked the user, added a product to the cart, and found an address, you can create an order, using this action.
Note: This cannot be done when you haven't checked the user, when the cart is empty, or when the user doesn't have an address.
Complete Order
After the user make the payment, you can confirm this order and complete this process.
List Orders
For the customers to list the orders they had ordered, you can use this action.
To use this action, there should be at least one order so that you can show these orders to your customer. As the first step, you need to check whether there is an order or not. ORDER_NOT_FOUND parameter should be used to check the current orders. You can use Logic Action to control this parameter like following. If it equals 1, this means that there is no order so you need to inform your customer like "There is no order found for this account" . If it does not equal 1, you can list orders.
If ORDER_NOT_FOUND parameter does not equal 1, it means that there is an order and it will be automatically listed in a card which is coming from the code in the following format.
Title : Hangi siparişiniz ile işlem yapmak istersiniz?
Subtitle : null
Button Text : {1} tarihli {2} tutarındaki siparişiniz için {3} yazınız.
If you want to edit the text of card, you need to send following parameters with the desired texts from assistant parameters before you publish the bot.
- To change Title , ECOMMERCE_LIST_ORDER_TITLE_FOR_SINGLE_CARD parameter should be used.
- To change Subtitle, ECOMMERCE_LIST_ORDER_SUB_TITLE_FOR_SINGLE_CARD parameter should be used.
- To change Button Text, ECOMMERCE_LIST_ORDER_BUTTON_TEXT_FOR_SINGLE_CARD parameter should be used.
Delivery Status
Your customers are usually there to check the delivery status of the products they ordered. Using this action, you can check the products they ordered and notify them about the delivery status.
Show Products in Cart
Customers might like to see the products they have added to their basket. This action helps users to list these products.
Related Articles
How to Use the Integration Action for Non-developers
Why do we need the Integration Action? Virtual assistants are there to provide information and guidance for the user. The knowledge of the assistants is, however, limited to the conversation itself. When virtual assistants are incapable of providing ...How to Use Logic Action
Action usage Logic action is used when there is a conditional flow depending on the value of parameters in the current state. And logic action can contain multiple conditional units but always will use the connection of the last conditional unit ...How to Use Human Action
Action usage Human action is used to handover the conversation to the live agent. The handover configuration is defined for each channel in the channels section when you navigate to your company profile page. So to use this action its enough just to ...How to Use Bot Action
Action usage Bot action is used to forward the message to sub bot to achieve re-usability and to build up simple and clear bots. You will need to drag and drop it to your assistant canvas (or simply click on it from actions menu): Then you will need ...How to Use Integration Action
Action usage Use the integration action when you want to call an HTTP integration endpoint to achieve some custom business needs. You can process the parameters saved during the life cycle of the assistant, and either only store them out in some ...